
The Thunderbolts: Atlas
by Trip Somers
|
Like much of my work, this custom Atlas action figure from the Thunderbolts comic was inspired by RaginRon (RaginRon@aol.com). I used the same recipe as he, but I changed the sleeves and added my own little tweak to it, as I so often do!
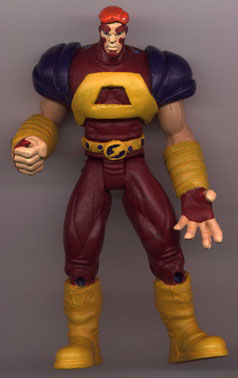 His recipe calls for the entire body of an X-Men Missle Flyers Bishop. Judging by Ron's picture, his was mostly a straight up repaint with a sculpted-on "A" across his chest and back.
The first step in this excruciating process is to find your X-Acto or your Dremel and make sure that those knee pads, shoulder pads, and forearm pads(?) are removed, or at least made workable. The glue Toy Biz used is unlike anything MacFarlance toys has ever seen. I mean, I almost gave up on the project because I couldn't remove the knee pads!
After all of the pads are removed you have to do your best to sand, scrape, slice, dice, and julienne the remainder of the glue on the figure (or else the paint job winds up looking funny). Once this is done, you can begin sculpting anywhere on the figure. A good place to start would be the holes left where the pads' pegs used to be.
After filling those pesky annoyances (a redundancy? I think so!), proceed to alter the boots in any way you see fit. I didn't alter them, because I thought that they looked fine the way they were (despite the fact that they don't match the comic). Now go find a good close up drawing of Atlas' gauntlets (his wrist/glove/armor thingies). Those are pretty simple, yet time consuming because of repetition. For the 4 "studs" on each gauntlet try making 4 little balls of clay and attaching them to their respective strap. I'm pretty sure they're not really straps but you get the idea. Then make 4 more balls roughly 1/3 the size of the previous balls, and attach them on top of the larger ones. Flatten them out a little and you should have a pretty darn good match up to the comic version.
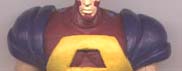
The "A" is next! Grab a considerable amount of clay and just go to work! No special tricks here, just try to match it to your reference picture as closely as possible. This is the last easiest part, enjoy it while you can!
 The shoulder pads (even though they're not pads... you notice how this seems to be the least describable costume in comic book history?) are a lot tougher. The Bishop figure has ball and socket joints which means you have to be extra careful when sculpting this next part. Unfortuneately, it also means that you have to sacrifice ALL shoulder poseability (at least with my method you do), so pick a cool pose!
If you notice in the comics, Atlas' shoulder rags are tucked into his costume along the sides of the "A", so be careful when starting that they're lined up to your satisfaction. Completely cover the deltoids (as you see fit) and overlap the trapezius(es?) a little bit. Impress the clay (hopefully you won't have to tell it jokes) with a tool of yours (that sentence was worse than I thought), to give a kind of layered look. At all times, be sure to keep checking your reference picture(s)!
The head is next. Since Bishop has a funny shaped head to begin with (what's with that nose anyway?), the first thing you'll need to do is give him a bigger nose. This is a tricky process that took me a while to perfect. Be careful of putting too much on, and if you put too little on the clay might just fall off. Then sculpt him some nice wavy hair! Cure the clay (harden it), paint it, and you're done!